Last Updated on October 19, 2025
To clean a window AC unit without removing it, follow these steps: Turn off the unit and unplug it from the power source. Remove the front panel and filter, then vacuum or wipe away dust and debris.
Clean the filter using a mild detergent and water, then allow it to dry completely before reinserting. Use a soft cloth or brush to clean the coils and fins, being careful not to bend them. Replace the front panel and filter, then plug the unit back in and turn it on.
Regularly clean and maintain your window AC unit to ensure efficient performance and prolong its lifespan.
Tools Required
To clean a window AC unit without removing it, you’ll need a few tools, including a vacuum cleaner with a brush attachment, a soft cloth or brush, a fin comb, and a mild cleaning solution. These tools will help you remove debris, dust, and dirt from the unit, ensuring it operates efficiently.
To clean your window AC unit without removing it, you’ll need a few tools to get the job done effectively. Here’s a list of the essential tools you should have on hand:
- Vacuum cleaner with brush attachment: This will help you remove dust, dirt, and other debris from the unit’s exterior and interior.
- Fin comb: A fin comb is used to straighten any bent fins on the AC unit, improving airflow and efficiency.
- Soft brush or microfiber cloth: Ideal for cleaning the interior components of the unit, such as the evaporator coils and fan blades, without causing damage.
- Mild detergent or window cleaner: These cleaning agents are perfect for removing stubborn dirt and grime from the AC unit’s surfaces.
- Water-filled spray bottle: Fill a spray bottle with water to moisten the surfaces before cleaning and to help remove dirt more easily.
- Towels or drop cloth: Protect your surroundings from water splashes or dirty debris by placing towels or a drop cloth underneath the AC unit.
- Screwdriver: You may need a screwdriver to remove any screws or access panels for deeper cleaning.
By gathering these tools, you’ll be ready to give your window AC unit a thorough cleaning without the hassle of removing it.
Now that you have a clear understanding of the necessary tools, let’s proceed to the next steps to effectively clean your window AC unit.
Preparing For Cleaning
Learn how to clean your window AC unit without the hassle of removing it. Keep your space cool and fresh by following these simple steps.
Before you begin to clean your window AC unit without removing it, it is important to follow a few simple steps to ensure the task goes smoothly. Taking these precautions will help protect yourself and your surroundings. Here’s what you need to do:
- Turn off the AC unit and unplug it: To avoid any accidents, make sure the AC unit is turned off and unplugged from the power source. This will ensure your safety while cleaning.
- Remove the front grille of the AC unit: Locate the screws or clips that hold the front grille in place. Use a screwdriver or your hands (depending on the model) to safely remove the front grille. This will give you access to the internal components that need cleaning.
- Cover the surrounding area with towels or a drop cloth: Cleaning may create a mess of dust and debris, so it’s essential to protect the surrounding area. Lay down towels or a drop cloth around the AC unit to catch any dirt that may fall during the cleaning process.
By following these steps, you’ll be well-prepared to clean your window AC unit effectively and efficiently. Now let’s move on to the next step: cleaning the AC unit’s interior.
Removing Dust And Debris
To clean a window AC unit without removing it, start by turning off the unit and removing the front panel. Use a soft brush or vacuum cleaner attachment to carefully remove dust and debris from the coils, fins, and filters.
Finish by wiping the surfaces with a damp cloth for a thorough clean.
Dust and debris can accumulate over time in your window AC unit, hindering its efficiency and cooling capabilities. It’s important to regularly clean and maintain your unit to ensure optimal performance. Here are some simple steps to remove dust and debris without the need to remove the entire unit:
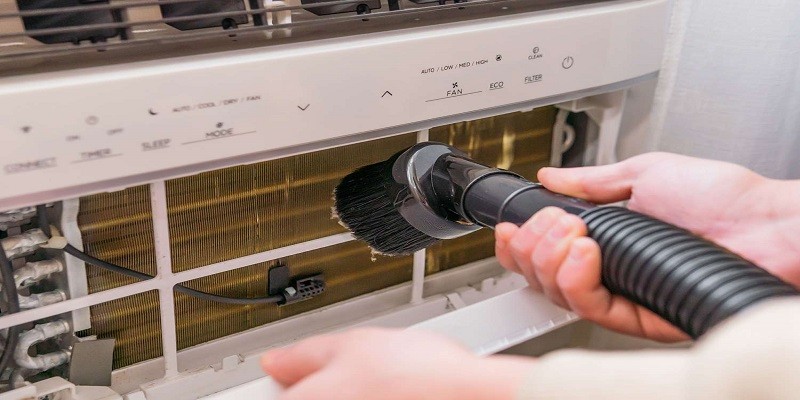
- Use the vacuum cleaner with the brush attachment to remove loose dirt and dust from the vents and fins: Start by attaching the brush attachment to your vacuum cleaner. Gently run the brush along the vents and fins, moving in a back-and-forth motion. This will help loosen and suck up any loose dirt or dust that may have accumulated.
- Gently brush the condenser coils with a soft brush or microfiber cloth to remove any dirt or debris: The condenser coils are located behind the fins and are responsible for cooling the air. Using a soft brush or microfiber cloth, carefully brush the coils to remove any dirt or debris that may have collected. Be gentle to avoid damaging the delicate coils.
- Straighten any bent fins with a fin comb: Over time, the fins on your AC unit can become bent or misaligned, obstructing the airflow. Using a fin comb, which can be easily purchased from a hardware store, gently straighten the fins by sliding the comb through them. Ensure that each fin is aligned properly for optimum performance.
Regularly cleaning your window AC unit and removing dust and debris will not only improve its efficiency but also prolong its lifespan. Make it a part of your routine maintenance to enjoy clean and cool air during hotter months.
Cleaning The Filter
To clean the filter of your window AC unit without removing it, follow these steps: turn off the unit and unplug it, locate the filter, gently remove and rinse it with warm water, let it air dry completely, and then place it back into the unit.
Regularly cleaning the filter will ensure optimal performance and better air quality.
One of the essential steps in cleaning your window AC unit without removing it is to regularly clean the filter. A dirty filter can hinder the unit’s performance and reduce its efficiency, so it’s important to keep it clean. Here’s how you can effectively clean the filter:
- Remove the filter from the AC unit: Locate the filter, usually found behind a panel or grille on the front of the unit. Carefully remove the filter by following the manufacturer’s instructions.
- Vacuum the filter to remove loose debris: Start by using a vacuum cleaner with a brush attachment to remove any loose debris, such as dust, pet hair, or dirt. Gently run the brush over both sides of the filter to ensure thorough cleaning.
- Fill a sink or basin with warm water and a mild detergent or window cleaner: Prepare a cleaning solution by adding a small amount of mild detergent or window cleaner to a basin or sink filled with warm water. Ensure that the temperature is not too hot or cold, as extreme temperatures can damage the filter.
- Submerge the filter in the soapy water and gently scrub it with a soft brush: Place the filter in the soapy water and allow it to soak for a few minutes. Use a soft-bristled brush to gently scrub the filter, paying attention to areas with visible dirt or stains. Avoid scrubbing too vigorously to prevent any damage to the filter.
- Rinse the filter thoroughly with clean water and let it air dry completely before reinstalling: Once you have thoroughly scrubbed the filter, rinse it under clean running water. Make sure to remove all traces of soap and dirt. Shake off any excess water and set the filter aside to air dry completely. It’s important to let the filter dry completely before reinstalling it to prevent mold or mildew growth.
Remember, regular cleaning of your window AC unit’s filter is crucial for maintaining its efficiency and prolonging its lifespan. By following these simple steps, you can ensure that your filter remains clean and free from debris, allowing your AC unit to function optimally.
Cleaning The Evaporator Coil
To clean the evaporator coil of your window AC unit without removing it, start by turning off the unit and removing the front panel. Gently brush away any loose dirt and debris from the coil using a soft brush or vacuum cleaner.
Then, mix a solution of water and mild detergent and apply it to the coil using a spray bottle. Let the solution sit for a few minutes before rinsing it off with clean water. Finally, reinstall the front panel and turn on the unit.
To ensure optimum performance of your window AC unit, it is essential to clean the evaporator coil regularly. Dust and debris can accumulate on the coil over time, reducing its efficiency and potentially causing damage. Follow these steps to clean the evaporator coil without removing it:
Use The Soft Brush Or Microfiber Cloth To Clean The Evaporator Coil, Removing Any Dirt Or Debris:
- Gently brush the surface of the coil to loosen and remove any loose dirt or debris.
- Take care not to apply too much pressure to avoid damaging the delicate fins of the coil.
Spray A Mixture Of Water And Mild Detergent Onto The Coil And Let It Sit For A Few Minutes:
- Prepare a solution of water and mild detergent in a spray bottle.
- Spray the solution onto the coil, ensuring even coverage.
- Allow the solution to sit on the coil for a few minutes to help dissolve stubborn dirt and stains.
Gently Scrub The Coil With A Soft Brush To Remove Stubborn Dirt Or Stains:
- Using a soft brush, gently scrub the coil in a back and forth motion.
- Focus on areas with visible dirt or stains, applying a bit more pressure if needed.
- Be careful not to bend or damage the delicate fins while scrubbing.
Rinse The Coil Thoroughly With Clean Water And Let It Air Dry Completely Before Reassembling:
- Use a hose or spray bottle filled with clean water to rinse off the detergent and any remaining dirt.
- Ensure that all the detergent is completely washed away.
- Allow the coil to air dry completely before reassembling the AC unit to prevent any moisture-related issues.
Follow these steps regularly to keep your window AC unit running efficiently and extend its lifespan. Cleaning the evaporator coil is an essential part of maintenance that helps improve cooling performance and prevent potential issues caused by dirt buildup.
Cleaning The Blower Fan
To clean the blower fan of your window AC unit without removing it, follow these easy steps. Firstly, turn off the unit and unplug it for safety. Then, gently remove any dust or debris from the fan blades using a soft brush or cloth.
Finally, vacuum the surrounding area to ensure a thorough clean.
When it comes to maintaining your window AC unit, cleaning the blower fan is an essential step. Over time, dust and debris can accumulate on the fan blades and housing, affecting its performance. Thankfully, you can clean the blower fan without removing it from the unit.
Follow these simple steps to ensure your AC continues to function optimally:
- Remove the screws holding the blower fan in place: Locate the screws securing the blower fan to the AC unit and carefully unscrew them using a screwdriver. Keep track of the screws to avoid misplacing any.
- Use the vacuum cleaner with the brush attachment: Attach the brush attachment to your vacuum cleaner and gently run it over the fan blades and housing. This will effectively remove any dust, dirt, or debris that may have accumulated. Take your time to ensure thorough cleaning.
- Wipe down the blades and housing: After vacuuming, take a damp cloth or microfiber cloth and wipe down the fan blades and housing to eliminate any remaining dirt or grime. Be gentle to avoid damaging the blades or motor.
- Reassemble the blower fan and tighten the screws: Once you have finished cleaning, carefully align the blower fan back into the unit. Make sure it sits securely in place. Then, using your screwdriver, tighten the screws to secure the fan. Double-check that each screw is properly tightened.
Taking the time to clean your window AC unit’s blower fan can significantly improve its efficiency and overall performance. By following these simple steps, you can ensure that your AC continues to provide you with cool and clean air for a long time to come.
Cleaning The Drainage System
To clean a window AC unit without removing it, follow these simple steps: First, turn off the unit and unplug it. Then, remove the front cover and clean the filter with a vacuum or brush. Next, use a soft cloth or brush to clean the coils and fins.
Finally, clean the drainage system by gently removing any debris or blockages.
Locate The Drainage Hole Or Pipe On The Ac Unit:
- Begin by identifying the drainage hole or pipe on your window AC unit. Typically, it is located at the back or bottom of the unit.
- Look for a small opening or a pipe that extends from the unit. This is where the condensation from your AC unit is drained.
Use A Thin Brush Or Pipe Cleaner To Clear Any Clogs Or Blockages In The Drainage System:
- Take a thin brush or pipe cleaner to remove any debris, dust, or clogs from the drainage system.
- Gently insert the brush or cleaner into the drainage hole or pipe and carefully move it back and forth to dislodge any blockages.
- Be cautious not to apply too much pressure to avoid causing damage to the AC unit.
Flush The System With Clean Water To Ensure Proper Drainage:
- Use a clean water source, such as a bucket or a hose, to flush the drainage system.
- Slowly pour water into the drainage hole or pipe to allow it to flow through the system and clear any remaining debris.
- Ensure that the water flows freely and exits the AC unit. If the water does not drain properly, there may still be some blockages present.
Remember, maintaining a clean drainage system is crucial for the optimal performance of your window AC unit. By regularly cleaning the drainage system, you can prevent clogs and keep your unit running efficiently.
Reassembling The Ac Unit
Looking to clean your window AC unit without removing it? Learn how to easily reassemble the unit after cleaning to keep it running efficiently.
After you have successfully cleaned the different components of your window AC unit, it’s time to put everything back together. Follow these steps to reassemble your AC unit:
Place the cleaned filter back intothe AC unit:
- Open the front grille of the AC unit.
- Take the filter and carefully insert it back into its original position.
- Ensure that the filter is snugly fitted and aligned correctly with the filter frame.
Reattach the front grille and secure it with screws:
- Line up the front grille with the AC unit body.
- Insert the screws into their designated holes and tighten them securely using a screwdriver.
Plug in the AC unit and turn it back on:
- Locate the power cord and plug it into a nearby electrical outlet.
- Switch on the AC unit by pressing the power button or adjusting the thermostat.
Test the unit to ensure it is working properly:
- Feel the air coming out of the unit to check for proper airflow.
- Listen for any unusual noises or vibrations that may indicate a problem.
- Adjust the temperature settings to verify if the AC unit responds accordingly.
Remember to clean your window AC unit regularly to maintain its efficiency and prolong its lifespan. By following these steps, you can ensure that your AC unit stays in optimal condition throughout the hot summer months.
Regular Maintenance Tips
Keep your window AC unit clean and functioning efficiently by following these simple maintenance tips. Learn how to clean the unit without removing it for hassle-free maintenance.
Regular maintenance is essential to keep your window AC unit running smoothly and efficiently. By following these simple tips every 2-3 months, you can prevent dirt buildup and ensure optimal performance.
Clean the AC unit every 2-3 months to prevent dirt buildup:
A dirty AC unit can restrict airflow and reduce cooling efficiency. To clean the unit without removing it, follow these steps:
- Start by turning off the power to the unit.
- Remove the front grill or cover.
- Gently vacuum the fins and coils to remove dust and debris.
- Use a soft brush to loosen any stubborn dirt.
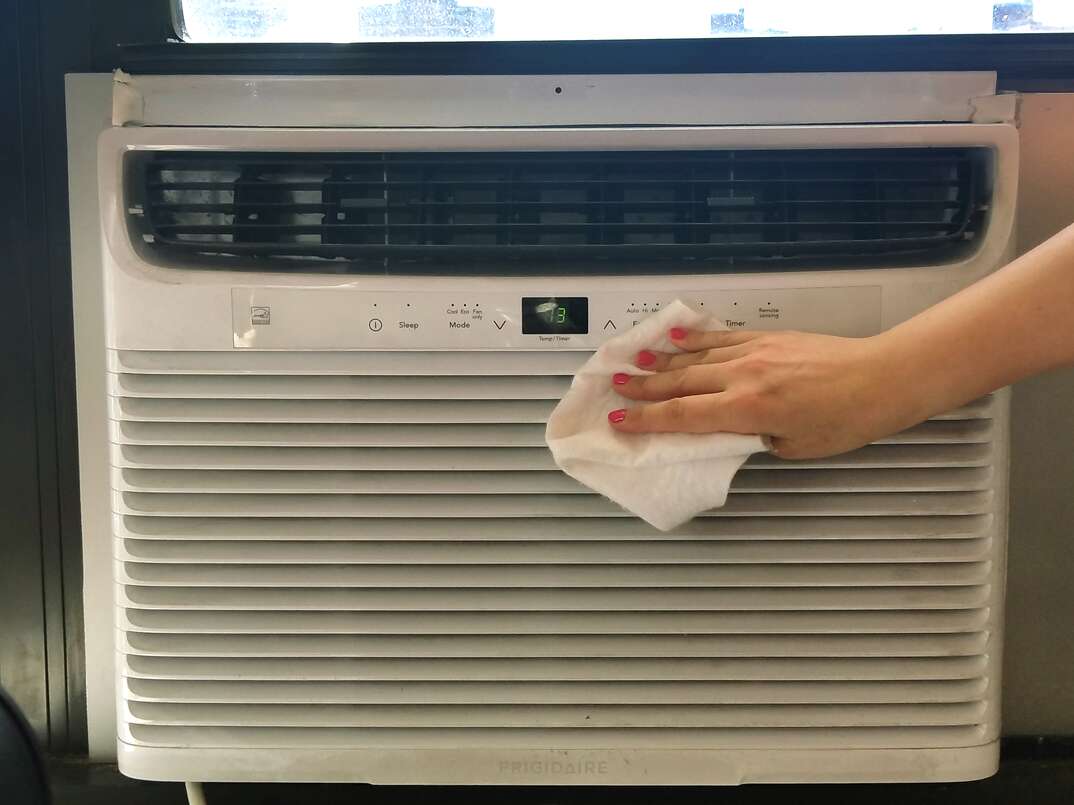
- Wipe down the exterior with a damp cloth.
- Finally, replace the grill or cover and turn the power back on.
Check and replace the filter regularly:
The filter in your AC unit plays a crucial role in trapping dust and allergens. A clogged filter can impair airflow and decrease cooling capacity. To maintain a clean filter:
- Refer to your unit’s manual for specific instructions on how to locate and remove the filter.
- Inspect the filter for dirt and debris.
- If dirty, gently clean it with mild soap and water or replace it with a new filter.
- Remember to reinstall the filter properly before using the AC unit.
Keep the area around the AC unit clean and free from debris:
Clearing the space around your window AC unit helps improve its efficiency and longevity. Follow these guidelines:
- Remove any objects that obstruct the unit’s airflow, such as furniture, curtains, or plants.
- Regularly sweep or vacuum the surrounding area to prevent dirt and debris from entering the unit.
- Trim any nearby vegetation to ensure proper airflow and prevent leaves and branches from obstructing the unit.
Schedule professional maintenance at least once a year for a thorough cleaning and inspection:
While regular maintenance by yourself is beneficial, it’s also important to have a professional technician inspect your window AC unit annually. They can provide a comprehensive cleaning, check for any issues, and ensure optimal performance and energy efficiency.
Remember, a well-maintained window AC unit not only cools your space effectively but also saves energy and prolongs the lifespan of the unit. So, make it a priority to follow these regular maintenance tips for a cool and comfortable environment all year round.
Credit: www.homeserve.com
Frequently Asked Questions For How To Clean Window Ac Unit Without Removing?
Is There A Way To Clean The Inside Of A Window Air Conditioner?
Yes, you can clean the inside of a window air conditioner by following these steps.
How Do You Clean Dust Out Of A Window Air Conditioner?
To clean dust from a window air conditioner, follow these steps: 1. Turn off and unplug the air conditioner. 2. Remove the front grille and filter. 3. Use a vacuum cleaner with a brush attachment to gently remove dust from the filter and grille.
4. If the fins are dusty, use a soft brush or a fin comb to carefully clean them. 5. Wipe the inside of the unit with a damp cloth. 6. Let the parts air dry completely. 7. Reassemble the filter and grille.
8. Plug in and turn on the air conditioner. Now your window air conditioner is clean and ready to use!
How Do You Clean Condenser Coils On A Window Air Conditioner?
To clean condenser coils on a window air conditioner, follow these steps: 1. Turn off the power and unplug the unit. 2. Remove the front panel and locate the coils. 3. Use a brush or vacuum to remove dust and debris.
4. Use a coil cleaner or a mixture of water and mild detergent to clean the coils. 5. Rinse the coils with water and let them dry completely. 6. Put the front panel back on and plug in the unit.
Can You Clean A Window Ac Without Taking It Out Of The Window?
Yes, you can clean a window AC without removing it from the window.
Can I Clean My Window Ac Unit Without Removing It?
Yes, you can clean your window AC unit without removing it by following a few simple steps.
Conclusion
Maintaining a clean window AC unit is essential for efficient cooling and optimal indoor air quality. By following the step-by-step guide provided in this blog post, you can easily clean your window AC unit without the hassle of removing it.
Regularly cleaning the filters, evaporator coils, condenser coils, and drain pan will prevent dust, debris, and mold buildup, ensuring that your AC unit functions at its best. Additionally, using a coil cleaner and a vacuum cleaner with a brush attachment will help remove stubborn dirt and debris.
Remember to disconnect the power supply before cleaning and take necessary safety precautions. By adopting a routine cleaning schedule and implementing these cleaning techniques, you can extend the lifespan of your window AC unit and enjoy cool and clean air all summer long.