Last Updated on August 7, 2025
To clean an ice maker, it is important to follow these steps.

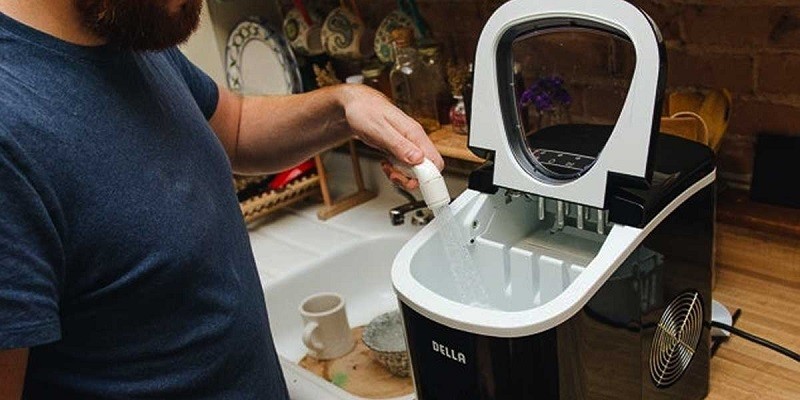
Credit: www.wikihow.com
The Basics Of Ice Makers
Regular cleaning is crucial for maintaining the performance of your ice maker. Clearing the water lines, sanitizing the interior, and removing any mineral buildup should be done periodically to ensure clean and fresh ice production.
Ice makers have become an essential appliance in many households and commercial establishments. They save time and effort by automating the process of making ice cubes. Understanding the components and operation of an ice maker, different types available, and the benefits of regular cleaning can help ensure its optimal performance and longevity.
Components And Operation Of An Ice Maker:
- Water supply valve: Allows the entry of water into the ice maker.
- Water filter: Removes impurities from the water, promoting clean ice production.
- Evaporator plate: Freezes the water into ice cubes.
- Ice mold: Holds the water until it freezes.
- Ice harvest heater: Loosens the ice cubes from the mold.
- Ice mold thermostat: Monitors the temperature to ensure proper ice formation.
- Bin thermostat: Regulates the ice maker’s operation and shuts it off when the bin is full.
- Bin level sensor: Detects the ice level and signals the ice maker to start or stop making ice.
- Ice scoop and dispenser: Collects and dispenses the ice cubes for easy access.
Different Types Of Ice Makers:
- Portable ice makers: Compact and versatile, these are ideal for small kitchens, outdoor events, or rvs. They produce ice quickly but have limited storage capacity.
- Built-in ice makers: Designed to be installed within cabinetry, these provide a seamless integration into your kitchen or bar area. They offer larger production capacity and storage options.
- Undercounter ice makers: Similar to built-in models, these ice makers fit underneath the counter. They are commonly used in commercial settings.
- Commercial ice makers: Designed for heavy-duty use in restaurants, bars, and hotels, these machines produce large quantities of ice for high-demand situations.
Benefits Of Regular Cleaning For An Ice Maker:
- Ensures hygienic ice production: Regular cleaning eliminates bacteria, mold, and mineral buildup, ensuring that the ice produced is safe for consumption.
- Prevents clogs and malfunctions: Cleaning removes any residue or mineral deposits that can clog the water lines, valves, or components, thus preventing potential malfunctions.
- Maintains optimal performance: Clean ice makers operate efficiently, producing ice faster and ensuring consistent ice cube formation.
- Extends lifespan: Regular cleaning helps prevent corrosion and damage to the ice maker’s internal components, resulting in a longer lifespan.
- Improves taste and clarity: Cleaning removes impurities, resulting in ice cubes that are clear, odorless, and free from any unpleasant taste.
Remember, understanding the components and operation of your ice maker, the different types available, and the benefits of regular cleaning will help ensure its longevity and provide you with clean and efficient ice cubes whenever you need them. Take the time to clean your ice maker regularly and enjoy the benefits it brings to your everyday life.
Signs It’S Time To Clean Your Ice Maker
Is your ice maker not producing ice like it used to? It may be time to clean your ice maker. Keep your ice machine running smoothly by following these simple steps to clean and maintain it properly.
Is your ice maker not producing as much ice as it used to? Are the ice cubes starting to taste off? These could be signs that your ice maker is in dire need of a good cleaning. Regular maintenance and cleaning are crucial to keep your ice maker performing at its best and ensure you have clean, refreshing ice on hand whenever you need it.
Common Indicators Of A Dirty Ice Maker:
- Decreased ice production: When your ice maker starts churning out fewer ice cubes than usual, it’s a clear sign that it may need a thorough cleaning. A build-up of mineral deposits, dirt, and mold can hinder the ice-making process.
- Foul odor: Have you noticed a strange smell coming from your ice cubes? A dirty ice maker can harbor bacteria, mold, and food particles, resulting in unpleasant odors that can taint the taste of your drinks.
- Discolored or cloudy ice: If your ice cubes appear cloudy or have a strange discoloration, it’s likely due to sediment, minerals, or debris that have accumulated inside your machine. Regular cleaning will help prevent the formation of impurities in your ice.
- Unpleasant taste: Have you ever taken a sip of your favorite beverage only to be greeted by an odd taste? A dirty ice maker can transfer the flavors of old food, minerals, or even cleaning solutions to your ice cubes, affecting the taste and quality of your drinks.
Regular cleaning and maintenance not only address these issues but also ensure that your ice maker operates efficiently and has a longer lifespan. Whether you have a portable ice maker or a built-in unit, taking care of it will save you from potential repairs and replacements down the line.
Importance Of Regular Maintenance And Cleaning:
- Prevents bacterial growth: Bacteria thrive in warm, damp environments, and your ice maker provides the perfect breeding ground. Regular cleaning helps eliminate these bacteria, ensuring that the ice you consume is safe and free from harmful contaminants.
- Improves ice quality: Clean ice maker components result in better-quality ice cubes. Regular cleaning removes mineral deposits, mold, and food particles that can affect the taste, clarity, and odor of your ice cubes.
- Enhances performance: A clean ice maker operates more efficiently, producing ice faster and using less energy. Regular maintenance keeps all the internal components in optimal condition, preventing blockages and ensuring smooth operation.
- Extends lifespan: Neglected ice makers are more prone to breakdowns and malfunctions. Routine cleaning and maintenance help prolong the lifespan of your ice maker, saving you the cost and hassle of premature replacements.
- Promotes food safety: Dirty ice makers can contaminate ice with bacteria, posing a risk to your health. Regular cleaning reduces the chances of foodborne illnesses and keeps your beverages safe to consume.
By paying attention to the signs of a dirty ice maker and committing to regular cleaning and maintenance, you’ll not only enjoy clean and refreshing ice but also ensure the longevity and optimal performance of your ice maker. Keep your ice maker in top shape and enjoy the convenience of ice whenever you need it.
Supplies Needed To Clean Your Ice Maker
To clean your ice maker, you’ll need a few supplies: a soft cloth, mild soap, warm water, a toothbrush or small brush, and vinegar. These items will help remove dirt, mold, and calcium buildup from your ice maker, ensuring clean and fresh ice for your beverages.
Essential Cleaning Materials
To effectively clean your ice maker, you’ll need the following supplies:
- Soft cloth or sponge: This will help you wipe away any dirt and grime without damaging the surface of your ice maker.
- Mild dish soap: Using a gentle soap solution will help remove any stuck-on residue or food particles from your ice maker.
- Warm water: Mixing warm water with dish soap creates an effective cleaning solution that is safe to use on your ice maker.
- Toothbrush or soft bristle brush: This will allow you to scrub hard-to-reach areas and remove any stubborn buildup in small crevices.
- Clean towels or paper towels: These will come in handy for drying off your ice maker after cleaning.
Recommended Cleaning Products
While basic supplies will get the job done, some specialized cleaning products can help enhance the cleaning process:
- Ice machine cleaner: This specially formulated cleaner is designed to remove mineral deposits and scale buildup inside your ice maker. It can improve the taste and quality of your ice.
- Sanitizing solution: To ensure your ice maker is free of bacteria and other harmful contaminants, using a sanitizing solution can provide an extra level of cleanliness.
- Vinegar: An alternative to ice machine cleaner, vinegar is a natural cleaning agent that can help dissolve mineral deposits and disinfect your ice maker.
Remember to always check your ice maker’s manufacturer guidelines for any specific cleaning recommendations they may have.
Safety Precautions To Consider
Cleaning your ice maker involves dealing with water and cleaning agents, so it’s important to take precautions to keep yourself safe:
- Turn off and unplug the ice maker: This will prevent any accidents while cleaning and ensure your safety.
- Use gloves: Wearing protective gloves will protect your hands from any potential irritants in the cleaning products and prevent contamination.
- Follow instructions: Read and follow all the instructions provided by the manufacturer for both the cleaning supplies and the ice maker itself.
- Ventilation: Make sure the area where you clean your ice maker is well-ventilated, as some cleaning agents may have strong odors or fumes.
By gathering the essential cleaning materials, considering recommended cleaning products, and taking safety precautions, you can ensure a thorough and safe cleaning process for your ice maker. So let’s get ready to bring the sparkle back to your ice maker!
Turning Off And Emptying The Ice Maker
To clean an ice maker, one important step is to turn off and empty the ice maker. This ensures that any remaining ice and water can be removed, reducing the risk of contamination and enhancing the overall cleanliness of the appliance.
Steps To Safely Turn Off And Prepare The Ice Maker For Cleaning:
When it’s time to clean your ice maker, it’s essential to start by turning it off and emptying any existing ice. This ensures a thorough and effective cleaning process. Here are the steps to follow:
- Locate the power switch: Before you start, make sure you know where the power switch or control panel is located on your ice maker. It’s usually found on the front or side of the appliance.
- Turn off the ice maker: Once you’ve located the power switch, flip it to the off position. This will prevent the ice maker from continuing to make ice during the cleaning process.
- Allow existing ice to melt: It’s important to let any existing ice in the machine melt completely. This can be done by simply turning off the ice maker and waiting for the ice to thaw. Alternatively, you can remove the ice trays or bins and allow them to thaw separately.
- Empty the ice bin: Once the ice has melted, carefully remove the ice bin or container from the ice maker. Lift it gently and avoid any sudden movements to prevent spillage. Place the ice bin in a sink or large container to collect any water that may drip during the cleaning process.
- Dispose of the existing ice: With the ice bin now removed, you can dispose of the existing ice. It’s important to handle the ice in a sanitary manner. You can either use the ice for cooling purposes or discard it in a sink, toilet, or outside.
- Clean the ice bin: While the ice maker is turned off and emptied, take the opportunity to clean the ice bin thoroughly. Use warm soapy water and a non-abrasive sponge or cloth to scrub the inside of the bin. Rinse it well to remove any soap residue.
- Wipe down the exterior: After cleaning the ice bin, wipe down the exterior surfaces of the ice maker using a damp cloth. This will remove any dirt, dust, or spills that may have accumulated.
Now that you have safely turned off and emptied your ice maker, you are ready to move on to the next steps in the cleaning process. Stay tuned for our next blog post installment, where we will guide you through the cleaning procedure in detail.
Dismantling And Cleaning Ice Maker Components
To clean an ice maker, it’s important to dismantle and clean the various components thoroughly. This process helps ensure efficient functionality and hygienic ice production.
Cleaning an ice maker involves not only wiping down the exterior but also disassembling and cleaning the internal components to ensure optimal functioning. Here’s how to dismantle and clean the various parts of an ice maker:
Cleaning The Ice Bin And Scoop
- Remove the ice bin from the ice maker.
- Empty any remaining ice and discard it.
- Wash the ice bin with warm soapy water, using a mild detergent.
- Rinse the bin thoroughly to remove any soap residue.
- Dry the bin completely before placing it back into the ice maker.
- Clean the ice scoop by washing it with warm soapy water.
- Rinse the scoop thoroughly, and make sure it is completely dry before using it to handle ice again.
Removing And Cleaning The Ice Maker Assembly
- Before starting, ensure the ice maker is disconnected from the power source.
- Locate the ice maker assembly, typically at the top or side of the freezer compartment.
- Remove the mounting screws or clips holding the ice maker assembly in place.
- Carefully unplug any wiring harness or connectors, if applicable.
- Gently pull the ice maker assembly out of the freezer compartment.
- Fill a sink or basin with warm soapy water.
- Immerse the ice maker assembly in the soapy water and use a soft brush or cloth to clean it thoroughly.
- Pay special attention to remove any residue or built-up minerals.
- Rinse the assembly with clean water to remove any soap or debris.
- Allow the assembly to air dry completely before reinstalling it.
Cleaning Individual Parts Thoroughly
- Inspect the individual components of the ice maker assembly.
- If necessary, refer to the manufacturer’s instructions to identify removable parts.
- Remove any accessible parts, such as the ice mold or fill cup.
- Clean each part individually using warm soapy water and a soft brush or cloth.
- Rinse the parts thoroughly to remove any soap residue or debris.
- Check for any clogs or blockages in the water inlet valve or tubing.
- Use a small brush or pipe cleaner to clear any obstructions carefully.
- Allow all the parts to air dry completely before reassembling the ice maker.
Regularly cleaning the ice bin, scoop, ice maker assembly, and individual parts of your ice maker will help maintain its efficiency and extend its lifespan. Make sure to follow the manufacturer’s instructions to ensure proper cleaning and avoid damaging any delicate components.
Proper Cleaning Techniques For Different Ice Maker Types
Maintaining the cleanliness of your ice maker is essential for its optimal performance. Learn the proper cleaning techniques for different ice maker types to ensure hygiene and efficiency.
Cleaning an ice maker is an essential maintenance task that ensures the longevity and optimal performance of your ice-making machine. Depending on the type of ice maker you have—freestanding, built-in, or portable—there are specific cleaning techniques you should follow. In this section, we will outline the proper steps for cleaning each type of ice maker.
Cleaning A Freestanding Ice Maker:
- Turn off the ice maker and unplug it from the power source before starting the cleaning process.
- Empty the ice storage bin and discard any remaining ice.
- Prepare a mixture of mild soap or ice machine cleaner and warm water in a sink or cleaning bucket.
- Remove any removable parts, such as the ice scoop, water reservoir, and ice tray, and wash them thoroughly with the cleaning solution.
- Wipe down the interior of the ice maker with the cleaning solution, paying extra attention to hard-to-reach corners and crevices.
- Rinse all the parts and surfaces with clean water to remove any residue from the cleaning solution.
- Allow the parts to air dry completely before reassembling the ice maker.
- Run a cycle of fresh water through the ice maker to rinse out any remaining cleaning solution.
- Plug the ice maker back into the power source and turn it on, allowing it to produce a fresh batch of ice.
Cleaning A Built-In Ice Maker:
- Begin by shutting off the water supply to the ice maker. Refer to the manufacturer’s instructions for the location of the shut-off valve.
- Empty the ice storage bin and dispose of any ice.
- Prepare a cleaning solution using mild soap or ice machine cleaner and warm water.
- Use a sponge or cloth soaked in the cleaning solution to wipe down the interior surfaces of the ice maker, including the ice tray and water lines.
- Pay special attention to removing any mineral deposits or limescale buildup.
- Rinse all the parts and surfaces with clean water to remove any residue from the cleaning solution.
- Allow the ice maker to air dry thoroughly.
- Once dry, turn on the water supply and allow the ice maker to produce a batch of ice to ensure clean water circulation.
Cleaning A Portable Ice Maker:
- Before beginning, make sure to unplug the ice maker from the power source.
- Empty the ice storage basket and discard any remaining ice.
- Create a cleaning solution by mixing warm water with mild soap or ice machine cleaner.
- Using a sponge or cloth dampened with the cleaning solution, wipe down the interior surfaces of the ice maker, paying attention to the water reservoir and ice tray.
- Rinse all the parts and surfaces with clean water, removing any residue from the cleaning solution.
- Allow the ice maker to air dry completely.
- Plug the ice maker back into the power source and turn it on, running a cycle of fresh water to ensure all cleaning residues are flushed out.
- Once the cleaning cycle is complete, the ice maker is ready to produce ice for your enjoyment.
Remember, regular cleaning of your ice maker helps maintain its efficiency and ensures the production of clean, great-tasting ice. By following these proper cleaning techniques based on the type of ice maker you own, you can keep your ice maker in excellent condition for years to come.
Regular Cleaning Schedule And Routine Maintenance
Regular cleaning and routine maintenance are essential for keeping an ice maker in optimal condition. Learn how to clean and maintain your ice maker with this easy-to-follow guide.
Keeping your ice maker clean is crucial to ensure that it continues to produce fresh, high-quality ice. Regular cleaning and routine maintenance are essential steps in maintaining the performance and longevity of your ice maker. Follow these guidelines to establish an effective cleaning schedule and keep your ice maker in optimal condition:
Frequency Of Cleaning An Ice Maker
- Clean your ice maker every three to six months.
- Increase the cleaning frequency if you notice any signs of mold, mildew, or slime.
- Pay attention to the manufacturer’s recommendations for specific models, as cleaning intervals may vary.
Tips For Keeping The Ice Maker Clean On A Regular Basis
- Remove any excess ice regularly to prevent buildup and maintain optimal ice production.
- Wipe down the exterior of the ice maker with a damp cloth to remove dust and dirt.
- Sanitize the ice bin every few weeks using a solution of mild detergent and warm water. Rinse thoroughly afterward.
- Inspect the water supply line for any leaks or clogs. Repair or replace as necessary.
- Clean and disinfect the ice scoops and other accessories regularly to prevent cross-contamination.
- Use a soft brush to clean the condenser coils, removing dust and debris that can affect cooling efficiency.
- Check the drain line for any blockages and ensure it is clear to allow proper drainage.
- Avoid using harsh chemicals or abrasive materials for cleaning, as these may damage the ice maker.
- Refer to your ice maker’s manual for detailed cleaning instructions and any specific recommendations from the manufacturer.
- Regularly monitor the quality and taste of the ice. If you notice any changes, it may indicate the need for cleaning or maintenance.
By adhering to a regular cleaning schedule and performing routine maintenance tasks, you can keep your ice maker operating efficiently and producing clean, refreshing ice. Incorporate these tips into your ice maker maintenance routine to ensure the longevity and performance of your appliance.
Preventive Measures To Reduce Build-Up
Preventive measures are vital to reduce the build-up in an ice maker. Regular cleaning and disinfecting, removing and cleaning the parts, and using citric acid or vinegar solutions can help remove mineral deposits and maintain the efficiency of the ice maker.
Ice makers are an essential appliance that provides ice cubes on demand, but they require regular cleaning to ensure they stay in optimal condition. By implementing preventive measures, you can reduce the build-up and potential contamination in your ice maker.
Here are some key steps to follow:
Water Filtration Systems And Their Importance:
- Install a water filtration system: A high-quality water filtration system can significantly reduce the mineral content and impurities in the water used to make ice, resulting in cleaner and better-tasting ice cubes.
- Regularly change water filters: Water filters should be replaced according to the manufacturer’s recommendations. Regularly changing the filters prevents clogging and ensures that the water used is clean and free from contaminants.
- Use the right type of water: It is crucial to use potable water of suitable quality for ice making. Avoid using water that contains excessive minerals, chemicals, or impurities, as they can contribute to the build-up in the ice maker.
Avoiding Contamination And Ensuring The Ice Maker Stays Clean:
- Clean the ice maker regularly: Regular cleaning is necessary to remove any build-up of minerals, bacteria, or mold. Follow the manufacturer’s instructions for the recommended cleaning frequency.
- Use mild cleaning solutions: To clean the internal components of the ice maker, use a mixture of mild soap and warm water. Avoid using harsh chemicals or abrasive cleansers, as they can damage the ice maker.
- Thoroughly rinse after cleaning: After cleaning, make sure to rinse all the components thoroughly with clean water to remove any soap residue.
- Inspect and clean the ice bin: Regularly inspect the ice bin for any mold or dirt. Clean it with warm water and a mild soap solution, and remember to rinse it well.
- Clean the exterior: Wipe down the exterior of the ice maker regularly with a damp cloth to remove any dust or spills. This helps maintain a clean and presentable appearance.
By implementing these preventive measures, you can reduce the build-up in your ice maker and ensure that it operates efficiently and consistently produces clean ice cubes. Regular maintenance and cleaning not only extend the lifespan of your ice maker but also ensure that you enjoy the purest and best-tasting ice for your drinks.
Frequently Asked Questions For How To Clean An Ice Maker?
How Often Should I Clean My Ice Maker?
It is recommended to clean your ice maker every 3 to 6 months to maintain optimal performance and hygiene.
What Supplies Do I Need To Clean An Ice Maker?
To clean an ice maker, you will need white vinegar, warm water, a soft cloth, mild dish soap, and a toothbrush.
How Do I Clean The Inside Of My Ice Maker?
To clean the inside of your ice maker, mix equal parts white vinegar and warm water, apply the solution to a cloth, and wipe the interior surfaces.
Can I Use Bleach To Clean My Ice Maker?
No, it is not recommended to use bleach to clean your ice maker as it can leave harmful residues and affect the taste of the ice.
Why Is It Important To Clean An Ice Maker Regularly?
Regularly cleaning your ice maker prevents the buildup of bacteria, mold, and mineral deposits, ensuring the production of clean and safe ice for consumption.
Conclusion
Cleaning your ice maker is an essential part of ensuring its optimal performance and hygiene. By following the simple steps outlined you can keep your ice maker running smoothly and provide your family and guests with clean, fresh ice whenever they need it.
Regularly cleaning the interior and exterior, removing any mineral deposits, and sanitizing the components will help prevent bacteria growth and extend the lifespan of your ice maker. Remember to consult your manufacturer’s instructions for specific cleaning recommendations. By taking the time to clean your ice maker regularly, you can enjoy the benefits of a well-functioning and safe appliance for years to come.
So go ahead, give your ice maker some tender loving care, and enjoy ice that’s not only refreshing but bacteria-free too!