Last Updated on August 7, 2025
To clean a keurig needle, remove the k-cup holder and clean the needle using a paperclip and a damp cloth. Keurig machines are a convenient way to enjoy a cup of coffee or tea, but over time, the needle that pierces the k-cup can become clogged with coffee grounds or residue.
This can lead to a slower brewing time or even a malfunctioning machine. However, with a few simple steps, you can clean the keurig needle and ensure that your machine continues to deliver a delicious cup of hot beverage every time.
In this article, we will provide you with a step-by-step guide on how to clean a keurig needle effectively. By following these instructions, you can keep your keurig machine in optimal condition and enjoy your favorite hot beverages without any hassle.

Credit: www.beanground.com
Why Cleaning Your Keurig Needle Is Important
Ensuring optimal brewing performance:
- The keurig needle is responsible for puncturing the k-cup and allowing hot water to flow through for brewing.
- Over time, the needle can become clogged with coffee grounds and debris, affecting the flow of water and leading to subpar brewing performance.
- Cleaning the needle regularly ensures that it remains clear and unobstructed, allowing for a smooth and efficient brewing process.
Preventing clogs and blockages:
- When the keurig needle gets clogged, it can cause coffee grounds and other particles to accumulate inside the machine.
- This can eventually lead to clogs and blockages in the brewing system, resulting in a slow brewing process or even total machine malfunction.
- Regularly cleaning the needle helps prevent these issues and ensures that your keurig machine continues to operate smoothly.
Maintaining the longevity of your keurig machine:
- Neglecting to clean the keurig needle can not only impact the machine’s brewing performance but also shorten its lifespan.
- Coffee residue and mineral deposits can build up on the needle, causing it to corrode or become permanently damaged.
- By regularly cleaning the needle, you’ll extend the life of your keurig machine and enjoy many more cups of delicious coffee.
Cleaning the keurig needle is essential for ensuring optimal brewing performance, preventing clogs and blockages, and maintaining the longevity of your machine. By taking the time to clean the needle regularly, you can keep your keurig running smoothly and enjoy the perfect cup of coffee every time.
Signs That Your Keurig Needle Needs Cleaning
Is your morning coffee routine not going as smoothly as you’d like? It could be a sign that your keurig needle needs some cleaning. The needle is an essential part of your keurig machine, piercing the k-cup and allowing the hot water to flow through, extracting that delicious cup of joe.
Over time, the needle can get clogged up with coffee grounds and mineral deposits, affecting the brewing process. Here are some signs to look out for that indicate your keurig needle needs a good cleaning:
Slow Or Inconsistent Brewing:
- If you notice that your keurig is taking longer than usual to brew a cup of coffee or if the brewing process seems to stop and start intermittently, it could be a sign that the needle needs cleaning.
- A clogged needle can disrupt the flow of water, leading to slower brewing or even incomplete extraction of the coffee flavors. Cleaning the needle can help restore the efficiency of your machine and get your coffee brewing back to normal.
Coffee Grounds In Your Cup:
- Are you finding coffee grounds in your cup after brewing? This can be a frustrating taste and texture experience. It’s another sign that your keurig needle needs attention.
- When the needle gets clogged, it can’t properly pierce the k-cup, leading to coffee grounds escaping into your cup. Cleaning the needle will remove any lingering debris and ensure a cleaner, grit-free brew.
Unusual Noise During Brewing:
- Is your keurig making strange noises during the brewing process? This could be a clear indication that the needle is in need of a thorough cleaning.
- Mineral deposits and coffee residue can build up over time, causing the needle to become less efficient and potentially creating unusual sounds. A good cleaning will help remove these deposits, reducing noise and improving the performance of your keurig machine.
Regular cleaning and maintenance of your keurig needle not only ensures a better brewing experience but also prolongs the lifespan of your machine. So, if you’re experiencing slow or inconsistent brewing, finding coffee grounds in your cup, or hearing unusual noises during brewing, it’s time to give your keurig needle some much-needed attention.
Step-By-Step Guide To Cleaning Your Keurig Needle
Cleaning your keurig needle is an essential maintenance task that helps keep your coffee machine running smoothly and ensures that you get the best-tasting cup of joe every time. Over time, mineral deposits and coffee grounds can accumulate on the needle, leading to clogs and less efficient water flow.
By following these simple steps, you can easily clean your keurig needle and maintain the optimal performance of your machine.
Gather The Necessary Supplies
Before you begin cleaning your keurig needle, gather the following supplies:
- Paperclip or needle cleaning tool: These are used to clean out the needle effectively.
- Dish soap: For cleaning removable parts.
- Soft cloth or sponge: To wipe down the machine.
Power Off And Unplug Your Keurig Machine
Always start by powering off and unplugging your keurig machine. This is important for your safety and prevents any potential accidents while cleaning.
Remove And Clean The Removable Parts
The next step is to remove and clean the removable parts of your keurig machine. This typically includes the water reservoir, drip tray, and k-cup holder. Wash these parts with warm water and dish soap, ensuring all coffee residue is removed.
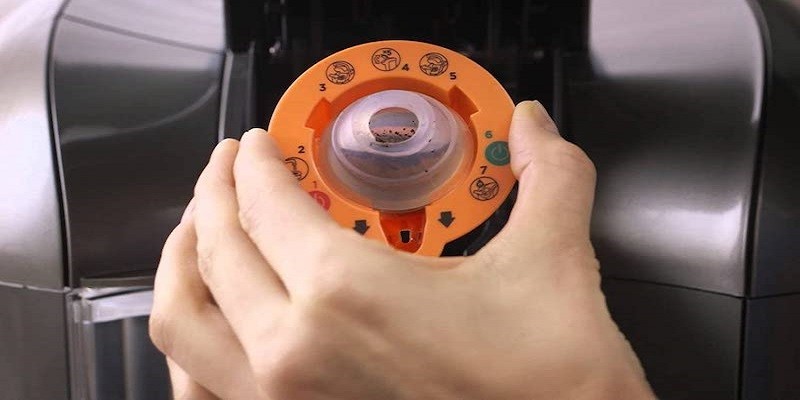
Locate And Access The Needle Area
Once you’ve cleaned the removable parts, it’s time to locate and access the needle area. This area is usually located in the k-cup holder. Look for a small puncture needle or tube where the water flows through.
Clean The Keurig Needle Using A Paperclip Or Needle Cleaning Tool
To clean the keurig needle, take a paperclip or needle cleaning tool and gently insert it into the needle or tube. Move it in and out several times to dislodge any clogs or debris. Be careful not to apply too much pressure or damage the needle.
Reassemble The Components And Perform A Test Run
After cleaning the keurig needle, reassemble the components including the water reservoir, drip tray, and k-cup holder. Once everything is back in place, plug in and power on your machine. Fill the water reservoir with clean water and run a test brew cycle without a k-cup.
This helps flush out any remaining debris.
By following these simple steps and cleaning your keurig needle regularly, you can enjoy a consistently great cup of coffee and prolong the life of your machine. Remember, a clean needle is key to optimum performance!
Frequently Asked Questions For How To Clean A Keurig Needle?
How Often Should I Clean The Keurig Needle?
It is recommended to clean the keurig needle every 2-3 months to ensure optimal performance and prevent clogs.
What Supplies Do I Need To Clean The Keurig Needle?
To clean the keurig needle, you will need a paperclip, a clean cloth or sponge, and warm soapy water.
How Do I Clean The Keurig Needle With A Paperclip?
Unplug the keurig, unfold a paperclip, gently insert it into the needle to dislodge any clogs, and remove any debris. Be cautious not to damage the needle.
Can I Clean The Keurig Needle Without A Paperclip?
Yes, instead of a paperclip, you can use a needle, toothpick, or a pin to carefully remove any clogs or debris.
What Should I Do If The Keurig Needle Is Still Clogged After Cleaning?
If the keurig needle is still clogged after cleaning, try repeating the process or consider descaling your keurig to remove mineral buildup.
Conclusion
To ensure a proper functioning keurig, it is crucial to keep the needle clean and free from any residue. Cleaning the needle is a simple process that can be done in just a few minutes. First, unplug the machine and carefully remove the pod holder.
Use a soft-bristled brush or a toothbrush to gently scrub around the needle, removing any coffee grounds or build-up. For stubborn residue, a mixture of water and vinegar can be applied using a cloth or cotton swab. Once the needle is clean, rinse it with warm water and dry it thoroughly before reassembling the pod holder.
Regularly cleaning the needle not only ensures a better tasting cup of coffee, but also prolongs the life of your keurig machine. By incorporating this simple maintenance task into your routine, you can enjoy a consistently great cup of coffee every time.