Last Updated on August 7, 2025
To clean turkey necks, remove any excess fats and feathers before washing them thoroughly with cold water. Then, follow proper hygiene practices and cook them well before consumption to ensure safety.
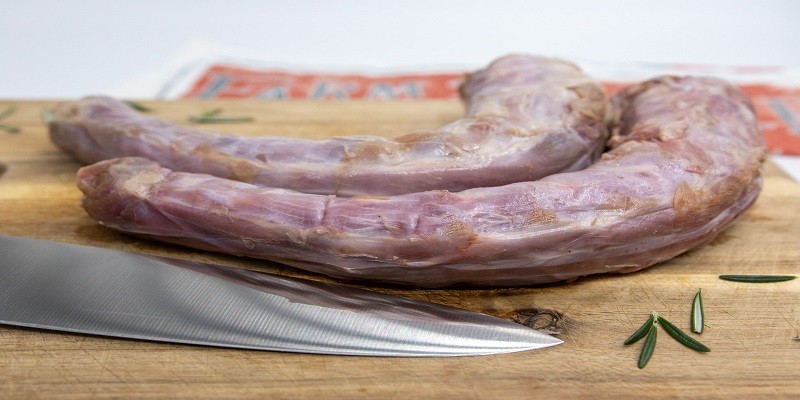
Turkey necks can be a delicious and nutritious addition to dishes like soups, stews, and stocks. The process of cleaning turkey necks is essential to remove any impurities and ensure that you have a clean and safe product to work with.
By properly cleaning and cooking the turkey necks, you can enjoy their tasty and tender meat in various culinary creations. Whether you are an experienced chef or a home cook, understanding how to clean turkey necks is an essential skill to have in your culinary repertoire.

Credit: www.pinterest.com
Why Cleaning Turkey Necks Is Important
Cleaning turkey necks is essential in ensuring food safety and removing any bacteria or contaminants. To clean turkey necks, start by rinsing them under cold water, then use a brush to scrub off any dirt or debris. Remember to sanitize all utensils and surfaces used during the process to avoid cross-contamination.
The Importance Of Cleaning Turkey Necks
The process of cleaning turkey necks is an essential step that should not be overlooked when preparing this part of the bird. By understanding the importance of cleaning turkey necks, you can ensure the safety and quality of your meal.
Let’s explore why cleaning turkey necks is so important:
- Avoiding potential bacteria: Uncleaned turkey necks have the potential to harbor harmful bacteria such as Salmonella and Campylobacter. Cleaning them thoroughly helps eliminate these bacteria and reduces the risk of foodborne illnesses.
- Removing dirt and debris: Turkey necks can accumulate dirt, feathers, and other debris during processing. Cleaning them ensures that you remove any unwanted substances, improving both the appearance and taste of the final dish.
- Enhancing flavor: Cleaning turkey necks allows for better seasoning penetration. By removing any impurities, the flavors you add during the cooking process can infuse into the meat more effectively, resulting in a more flavorful dish.
- Improving texture: Uncleaned turkey necks may have a gritty or unpleasant texture due to the presence of dirt or feathers. Cleaning them properly helps achieve a smoother, more enjoyable texture in the end.
- Promoting even cooking: Cleaning turkey necks helps promote even heat distribution during cooking. By removing excess fat or unwanted particles, you ensure that the meat cooks evenly, reducing the risk of overcooked or undercooked areas.
- Maintaining food safety standards: Properly cleaning turkey necks is an essential step in adhering to food safety standards. Following these practices helps minimize the risk of food contamination and ensures a safe dining experience for yourself and your loved ones.
By understanding the importance of cleaning turkey necks, you can take necessary precautions to avoid potential risks associated with consuming uncleaned meat. Now that we’ve explored the reasons why cleaning turkey necks is crucial let’s delve into the potential risks of consuming uncleaned turkey necks.
Tools And Equipment Needed
To clean turkey necks efficiently, gather the following tools and equipment: a sharp knife, cutting board, large pot, strainer, and paper towels. With these essentials, you’ll tackle the task with ease while ensuring a thorough clean.
Essential Tools And Equipment For Cleaning Turkey Necks
Cleaning turkey necks requires specific tools and equipment to ensure an efficient and thorough process. Here are the essential items you’ll need:
- Sharp kitchen shears: These will help you cut through tough skin and cartilage with ease. Opt for a pair of sturdy shears that can withstand the pressure of cutting through the turkey neck.
- Cutting board: A durable and clean cutting board provides a stable surface to work on while ensuring hygiene. Choose a board that is large enough to accommodate the size of the turkey neck.
- Knife: A sharp knife comes in handy for removing any excess fat or meat from the neck. Make sure the knife you use is suitable for precision and control.
- Paper towels: Keeping paper towels nearby allows you to easily wipe away any excess moisture or debris as you clean. This helps maintain a clean workspace throughout the process.
- Disposable gloves: Using disposable gloves is essential to maintain hygiene and prevent cross-contamination. They also protect your hands from any bacteria present in the turkey neck.
Tips For Choosing The Right Tools And Equipment
To ensure a seamless cleaning experience, follow these tips for selecting the appropriate tools and equipment:
- Quality matters: Invest in sturdy kitchen shears, a sharp knife, and a durable cutting board. These tools should be able to withstand the demands of cleaning a turkey neck and provide long-lasting performance.
- Ergonomics: Consider the ergonomics of the tools you choose. Opt for shears and a knife with comfortable handles that allow for a firm grip and precise control. Similarly, choose a cutting board that is comfortable to work on and doesn’t slide around.
- Size and compatibility: Ensure that the tools you select are suitable for the size of the turkey neck you’ll be cleaning. Smaller shears or a knife with a narrow blade might be more appropriate for smaller turkey necks, while larger tools may be necessary for bigger necks.
- Hygiene considerations: Disposable gloves and paper towels are vital for maintaining a hygienic workspace and preventing the spread of bacteria. Make sure the gloves fit properly and are made of a material that you find comfortable to work with.
By having these essential tools and equipment at hand, and following the tips for selecting the right ones, you’ll be well-prepared to efficiently clean turkey necks. Remember to prioritize hygiene throughout the process to ensure the safety of your food and yourself.
Step 1: Proper Preparations
To clean turkey necks, start with proper preparations. Follow these guidelines for a successful process: rinse the necks, remove excess fat, and trim any discolored parts.
Understanding The Importance Of Proper Preparations Before Cleaning Turkey Necks
Proper preparations are essential before delving into the process of cleaning turkey necks. By taking the time to gather necessary materials and create a suitable workspace, you can ensure a more efficient and hygienic experience.
Preparing The Workspace And Gathering Necessary Materials:
- Designate a clean and spacious area for the cleaning process.
- Set up a cutting board and gather the following materials:
- Two clean bowls for holding the cleaned necks and discarded parts.
- A sharp knife or poultry shears for cutting through the neck bones.
- A pair of kitchen gloves to maintain hygiene and protect your hands.
- Paper towels for wiping and absorbing any fluids.
- A trash bag within easy reach for disposing of unwanted parts.
Taking these preparatory steps will not only make the cleaning process smoother but also help maintain a clean and organized workspace.
Step 2: Removing Excess Fat And Skin
Step 2 in the process of cleaning turkey necks involves removing excess fat and skin, ensuring a lean and flavorful result. This step is crucial for achieving the desired texture and taste of the turkey necks.
Techniques For Removing Excess Fat And Skin From Turkey Necks:
Removing excess fat and skin from turkey necks is an important step in ensuring a delicious and appealing final dish. There are a few techniques you can use to achieve this:
- Method 1: Chilling in the refrigerator:
- Place the turkey necks in a covered container and refrigerate for at least 2 hours. The fat will solidify, making it easier to remove.
- Method 2: Scoring and peeling:
- Score the skin on the necks with a sharp knife, being careful not to cut into the meat. This will help the fat to render and make it easier to peel off the skin.
- Method 3: Boiling and skimming:
- Place the turkey necks in a large pot and cover them with water. Bring the water to a boil, then reduce the heat and let it simmer for about 15 minutes. Skim off any foam or fat that rises to the surface.
- Method 4: Using a paper towel:
- Pat the turkey necks dry with a paper towel to remove any excess moisture, as this can make it difficult to properly remove the fat and skin.
Tips For Ensuring Thorough Removal Of Unwanted Debris:
To make sure that your turkey necks are free from any unwanted debris, follow these helpful tips:
- Tip 1: Use a sharp knife:
- A sharp knife will make it easier to trim away the excess fat and skin. This will result in cleaner, neater cuts.
- Tip 2: Take your time:
- Removing excess fat and skin can be a meticulous process. Take your time and work carefully to ensure that you are thorough in removing all unwanted debris.
- Tip 3: Trim close to the meat:
- When removing excess fat and skin, trim as close to the meat as possible without cutting into it. This will ensure that you are removing the maximum amount of unwanted debris.
- Tip 4: Regularly clean your workstation:
- As you remove the fat and skin, make sure to clean your cutting board and any utensils you are using. This will prevent the spread of bacteria and maintain a hygienic workspace.
- Tip 5: Check for any remaining debris:
- After trimming off the excess fat and skin, check the turkey necks for any remaining debris. Use your fingers or a clean cloth to gently wipe away any remaining particles.
By following these techniques and tips, you can effectively remove excess fat and skin from your turkey necks, ensuring a cleaner and more appetizing dish.
Step 3: Rinsing And Washing The Neck
After completing the previous steps, it’s time to give the turkey neck a thorough rinse and wash. Remove any remaining dirt or debris and ensure a clean and hygienic neck before proceeding with your recipe.
Proper Rinsing And Washing Techniques For Turkey Necks
Once you have successfully removed the excess debris and impurities from your turkey neck, it’s time to move on to the next crucial step—rinsing and washing. This step is essential to ensure that your turkey neck is thoroughly cleaned and safe to consume.
Here’s how you can properly rinse and wash your turkey neck:
- Start by placing the turkey neck under cold running water. The water should be at a steady and gentle stream.
- Allow the water to flow over the turkey neck, ensuring that every nook and cranny is thoroughly saturated and rinsed.
- Gently rub the turkey neck with your hands, paying close attention to any folds or crevices. This will help to remove any remaining dirt or residue.
- If desired, you can use a mild detergent specifically designed for poultry cleaning. Make sure to read the instructions on the detergent and use it according to the recommended dilution ratio.
- Another option is to use a vinegar solution to wash the turkey neck. Mix one part vinegar with three parts water and soak the turkey neck in this solution for a few minutes. This will help to eliminate any bacteria or odors.
- Regardless of the method you choose, always remember to rinse the turkey neck thoroughly after washing. This will remove any traces of detergent or vinegar solution.
By following these proper rinsing and washing techniques, you can ensure that your turkey neck is not only clean but also safe for consumption. So let’s move on to the next step, where we’ll learn how to properly season the turkey neck for ultimate flavor.
Stay tuned!
Step 4: Final Inspection And Storage
In the final step of cleaning turkey necks, conduct a thorough inspection before storing them. Ensure they are properly cleaned and free from any remaining dirt or contaminants for safe storage and future use.
After cleaning the turkey neck, it’s important to perform a final inspection to ensure that all debris has been removed and prepare the neck for proper storage. Here are some tips to help you with this process:
Inspecting The Cleaned Turkey Neck For Any Remaining Debris:
- Hold the turkey neck up to the light and visually inspect it for any missed debris or feathers. Check both the inside and outside of the neck thoroughly.
- Gently run your fingers along the surface of the neck to feel for any remaining particles or rough spots.
- Use a pair of tweezers to remove any stray feathers or small pieces of debris that may have been overlooked.
- Rinse the turkey neck one final time under cool running water to remove any loosened debris.
Tips For Storing Cleaned Turkey Necks Properly:
- Pat the turkey neck dry with paper towels to remove excess moisture before storage.
- Place the cleaned and inspected turkey necks in airtight plastic bags or containers to prevent them from coming into contact with other foods in the refrigerator.
- Label the storage container with the date to ensure that you use the turkey necks within a safe timeframe.
- Store the turkey necks in the coldest part of your refrigerator, such as the bottom shelf or meat drawer, to maintain optimal freshness.
- Cleaned turkey necks can be stored in the refrigerator for up to 3 days. If you don’t plan to use them within that time frame, consider freezing them for longer-term storage.
By following these inspection and storage tips, you can ensure that your cleaned turkey necks are free from debris and properly stored for future use. Remember to always prioritize proper food handling and storage practices to maintain optimal freshness and safety.
Happy Cooking!
Frequently Asked Questions Of How To Clean Turkey Necks?
How Do You Clean A Turkey Before Cooking It?
To clean a turkey before cooking, start by removing the giblets and neck from the cavity. Rinse the turkey thoroughly with cold water, inside and out. Pat it dry with paper towels. Make sure to clean the sink and other surfaces that came into contact with the raw turkey to prevent cross-contamination.
Next, season the turkey with salt and any desired seasonings. Place it on a rack in a roasting pan. Optional step: truss the turkey by tying its legs together with kitchen twine. Preheat the oven, and then roast the turkey according to the recipe instructions.
Remember to use a meat thermometer to ensure it reaches the safe internal temperature of 165°F. Let the turkey rest for 20-30 minutes before carving and serving. Enjoy your delicious, safely cleaned and cooked turkey!
Do You Have To Use Vinegar To Clean Turkey?
No, it is not necessary to use vinegar to clean a turkey. There are other effective options available.
How Do You Clean Turkey Parts?
To clean turkey parts, first rinse them under cold water. Remove any excess fat or skin. Next, pat them dry with paper towels. Rub salt all over the parts to help remove bacteria. Let them sit for a few minutes, then rinse off the salt.
You can also use a mixture of vinegar and water for added cleanliness. Once rinsed, you can season the parts with your preferred spices and marinades. Ensure that they are thoroughly coated. Finally, place the parts in a sealed bag or container and refrigerate them for a few hours or overnight.
This process helps the flavors to penetrate the meat. Remember to wash your hands and any utensils used in the cleaning process to prevent cross-contamination.
How Do You Remove Salt From Smoked Turkey Necks?
To remove salt from smoked turkey necks, follow these steps. First, place the turkey necks in a large pot filled with cold water. Next, bring the water to a boil over high heat. Once boiling, reduce the heat to low and let the turkey necks simmer for about 30 minutes.
This will help to remove excess salt. After simmering, carefully remove the turkey necks from the pot and rinse them under cold water. Pat them dry with paper towels. Finally, they are ready to be used in your recipes without the overpowering saltiness.
Conclusion
Cleaning turkey necks is an essential step in preparing this flavorful meat. By following the steps outlined in this blog post, you can ensure that your turkey necks are properly cleaned and ready for cooking. First, start by removing any excess fat and skin from the necks.
Then, wash them thoroughly with cold water to eliminate any residual debris. Next, apply a mixture of vinegar and salt to further clean and tenderize the meat. Allow the vinegar and salt to sit for a few minutes before rinsing off.
Finally, pat the necks dry and they are ready to be cooked according to your recipe. Cleaning turkey necks may seem like a simple task, but it is an important one that can greatly improve the taste and overall quality of your dish.
So, don’t skip this step and enjoy the delicious results.