Last Updated on August 7, 2025
To clean a flute, gently disassemble the parts, use a soft cloth or cleaning rod with a cleaning solution, and wipe away dirt and moisture. Cleaning a flute regularly helps maintain its performance and longevity.
Flutes are delicate instruments that require special care to prevent damage or corrosion. A simple cleaning routine can keep your flute in optimal condition and ensure a clear tone. We will discuss the step-by-step process of cleaning a flute to help you maintain its pristine condition.
Follow these instructions to clean your flute effectively and prolong its lifespan.

Credit: www.forsyths.co.uk
Materials Needed For Flute Cleaning
To properly clean a flute, you will need a soft cloth, a cleaning rod, a flute cleaning brush, specially designed flute cleaning swabs, and silver polish if your flute has silver-plated keys. These materials are essential for maintaining the cleanliness and functionality of your instrument.
To properly clean your flute, you’ll need a few essential materials. These items will help ensure that your flute stays in optimal condition, producing beautiful music for years to come. Here are the materials you’ll need:
- Cleaning rod: A cleaning rod is a long, slender tool that is specifically designed to fit into the flute’s cleaning hole. This rod allows you to remove moisture and debris from inside the flute. It usually has a soft, cloth-covered end to avoid scratching the flute’s interior.
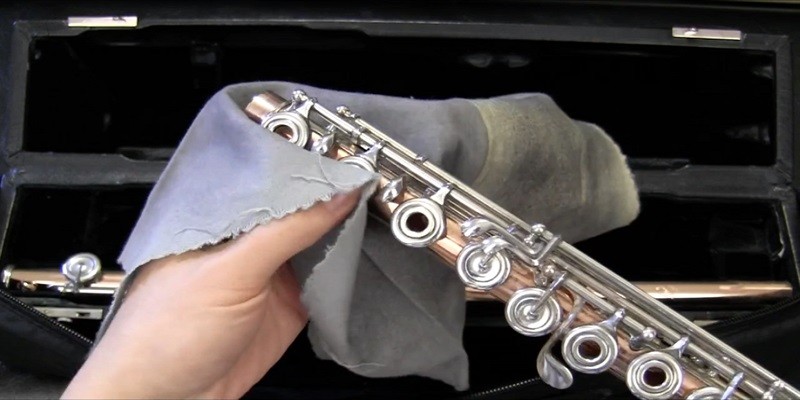
- Cleaning cloth: A soft, lint-free cleaning cloth is indispensable when it comes to keeping your flute clean. This cloth is used to wipe down the exterior of the instrument, removing fingerprints, dust, and dirt. It is essential to choose a cloth that won’t scratch or damage the delicate finish of your flute.
- Cleaning brushes: Cleaning brushes are small, specialized tools that help clean hard-to-reach areas of your flute. These brushes are typically made of soft bristles and come in various sizes to clean different sections of the instrument. They are excellent for cleaning the keys, mouthpiece, and other intricate parts of the flute.
- Cleaning solution: Using a suitable cleaning solution is vital to thoroughly clean the inside of your flute. This solution helps remove built-up grime and sanitizes the instrument. It is crucial to select a cleaning solution specifically designed for flutes to avoid damaging the delicate materials. Ensure to follow the manufacturer’s instructions when applying the solution.
By having these materials at hand, you will be well-prepared to keep your flute in excellent condition. Remember to clean your flute regularly to maintain its optimal performance and extend its lifespan. Your flute will thank you with beautiful, clear notes every time you play.
Step-By-Step Process For Cleaning A Flute
Discover the step-by-step process for effectively cleaning your flute and keeping it in pristine condition. From disassembling the flute to using specialized cleaning tools, this guide provides a comprehensive approach to maintaining the instrument’s longevity and performance.
Cleaning your flute regularly is essential to maintain its quality and prolong its lifespan. A flute gathers moisture and debris while playing, which can affect its sound and performance. In this guide, we will walk you through the step-by-step process of cleaning a flute to ensure it remains in optimal condition.
Follow these instructions to keep your flute sounding its best.
Disassemble The Flute
- Start by gently twisting and pulling the headjoint away from the body of the flute.
- Carefully unscrew and separate the foot joint from the body.
- Remove each key and mechanism by gently sliding them off their respective rods.
- Lay out all the disassembled parts on a clean and soft cloth to prevent scratching.
Cleaning The Body Of The Flute
- For the flute body, use a cloth slightly dampened with warm water and mild soap.
- Gently wipe the body’s exterior surface, including all the tone holes and keys.
- Pay extra attention to areas where moisture and debris tend to accumulate, such as the embouchure and keys.
- Wipe dry with a separate clean cloth to remove any remaining moisture.
- Avoid using excessive water or submerging the body in liquid, as it can damage the instrument.
Cleaning The Headjoint
- Take a cleaning rod with a cleaning cloth or swab attached to it.
- Insert the cleaning cloth or swab into the headjoint, starting from the open end.
- Slowly push the cloth or swab through the headjoint, carefully removing any moisture or debris.
- Repeat the process a few times until the cloth or swab comes out clean.
- Ensure the headjoint is completely dry before reassembling it with the rest of the flute.
Cleaning The Foot Joint
- Using a cleaning rod with a cloth or swab, insert it into the open end of the foot joint.
- Gently push the cloth or swab through the foot joint, removing any moisture or debris.
- Repeat the process until the cloth or swab appears clean and dry.
- Ensure the foot joint is completely dry before reassembling it with the rest of the flute.
Cleaning The Keys And Mechanism
- Take a small brush or soft cloth and gently clean each key and mechanism individually.
- Pay close attention to areas where dirt and grime can accumulate, such as the pivot points and hinge rods.
- Carefully remove any visible debris or residue buildup using the brush or cloth.
- Thoroughly dry each key and mechanism before reattaching them to the flute.
Cleaning The Mouthpiece And Lip Plate
- Start by removing any visible debris or moisture from the lip plate using a dry cloth or brush.
- Dampen a cloth with warm water and mild soap, then gently wipe the mouthpiece’s exterior.
- Pay attention to the embouchure hole and surrounding areas, ensuring all residue is removed.
- Dry the mouthpiece thoroughly before reattaching it to the headjoint.
By following these step-by-step instructions, you can effectively clean your flute and keep it in optimal condition. Performing regular maintenance in this manner will help your flute produce its best sound and ensure its longevity. Remember to handle all parts with care and avoid using excessive force to prevent any damage.
Enjoy playing your clean and well-maintained flute!
Avoiding Common Cleaning Mistakes
Learn the proper way to clean a flute by avoiding common cleaning mistakes. Follow these easy steps to keep your flute in top condition and to maintain its beautiful tone.
Cleaning a flute properly is essential for maintaining its sound quality and longevity. However, it’s crucial to be aware of common cleaning mistakes to avoid damaging your instrument. Here are some key points to keep in mind:
- Using the wrong cleaning solution:
- Avoid using harsh chemicals or abrasive cleaners, as they can damage the delicate components of your flute.
- Stick to flute-specific cleaning solutions recommended by manufacturers or professional music stores.
- Ensure the cleaning solution is compatible with the material of your flute, whether it’s silver, nickel, or gold-plated.
- Applying too much force while cleaning:
- Gentle cleaning techniques are important to preserve the integrity of your flute.
- Do not use excessive force when cleaning the keys, rods, or other components. Instead, use a soft cloth or specialized cleaning tools specifically designed for flutes.
- Be careful not to bend or damage any of the fragile parts of the flute, such as the keys or rods.
- Neglecting regular cleaning:
- Regular cleaning is crucial to prevent the buildup of dirt, grime, and moisture that can affect the flute’s sound quality.
- Make it a habit to clean your flute after every use by wiping it down with a soft, lint-free cloth.
- Pay extra attention to areas prone to moisture accumulation, such as the lip plate and the inside of the flute. Use a cleaning rod and cloth to reach these areas effectively.
Following these guidelines will help you maintain your flute in optimal condition, ensuring it produces beautiful melodies for years to come. Remember, a little care and attention go a long way in preserving your instrument’s quality and performance.
Frequently Asked Questions On How To Clean A Flute?
Q: How Often Should I Clean My Flute?
A: cleaning your flute after every use is recommended to maintain its sound quality and prevent buildup.
Q: What Are The Basic Steps To Clean A Flute?
A: disassemble the flute, clean each section with a cleaning rod and cloth, remove moisture from pads, and reassemble.
Q: Can I Use Water To Clean My Flute?
A: yes, but only use a small amount of lukewarm water with mild soap to clean the keys and body of the flute.
Q: How Do I Clean The Inside Of My Flute?
A: use a flute cleaning rod with a cloth to gently clean the inside of the flute’s body and remove any debris.
Q: Can I Use Alcohol To Clean My Flute?
A: it is not recommended to use alcohol on your flute as it can damage the pads and other components. Stick to water and mild soap.
Conclusion
To keep your flute in optimal condition, regular cleaning is essential. By following the steps outlined in this blog post, you can ensure that your flute remains free of grime, debris, and germs. Start by disassembling the flute and removing any excess moisture.
Then, clean each individual piece using a soft cloth or a specially designed cleaning rod. It’s important to be gentle yet thorough to avoid damaging the delicate instrument. Don’t forget to clean the head joint, body, and foot joint separately.
Once cleaned, you can use a silver polish cloth to restore the flute’s shine. Lastly, don’t neglect the case – wipe it down and ensure it is free from dust and dirt. By incorporating these cleaning tips into your routine, you’ll be able to enjoy the beautiful sound of your flute for years to come.